Welcome to this guide on installing a smart kitchen backsplash! In this article, we will explore the steps, do’s, and don’ts of installing a smart backsplash to enhance the functionality and aesthetics of your kitchen. A smart backsplash not only adds an element of style but also incorporates advanced features to make your cooking experience more efficient and enjoyable.
Whether you are a seasoned DIY enthusiast or a beginner, this comprehensive guide will provide you with the knowledge and insights to successfully install a smart kitchen backsplash.
| Takeaways |
|---|
| Proper planning and preparation are essential for a successful smart backsplash installation. |
| Choose a material that suits your style, is durable, and easy to maintain. |
| Follow the manufacturer’s instructions carefully for adhesive application and grouting. |
| Seek professional help if needed, especially for complex cuts or integrating smart features. |
| Regular maintenance and cleaning will help keep your smart backsplash looking its best. |
2. The Importance of a Kitchen Backsplash
Before we delve into the world of smart backsplashes, let’s understand why a kitchen backsplash is essential. A backsplash serves as a protective barrier between your kitchen walls and cooking activities. It prevents stains, moisture, grease, and other cooking splatters from damaging the walls and makes for easy cleaning. Additionally, a well-designed backsplash can greatly enhance the visual appeal of your kitchen, adding personality and charm to the space.
Building proper lighting in your kitchen is essential for both functionality and ambiance. Discover our step-by-step guide on DIY Under Cabinet Lighting Installation to brighten up your culinary workspace.
3. Understanding Smart Backsplashes

In recent years, smart technology has revolutionized our homes, and the kitchen is no exception. Smart backsplashes combine innovative technology with the functionality of a traditional backsplash.
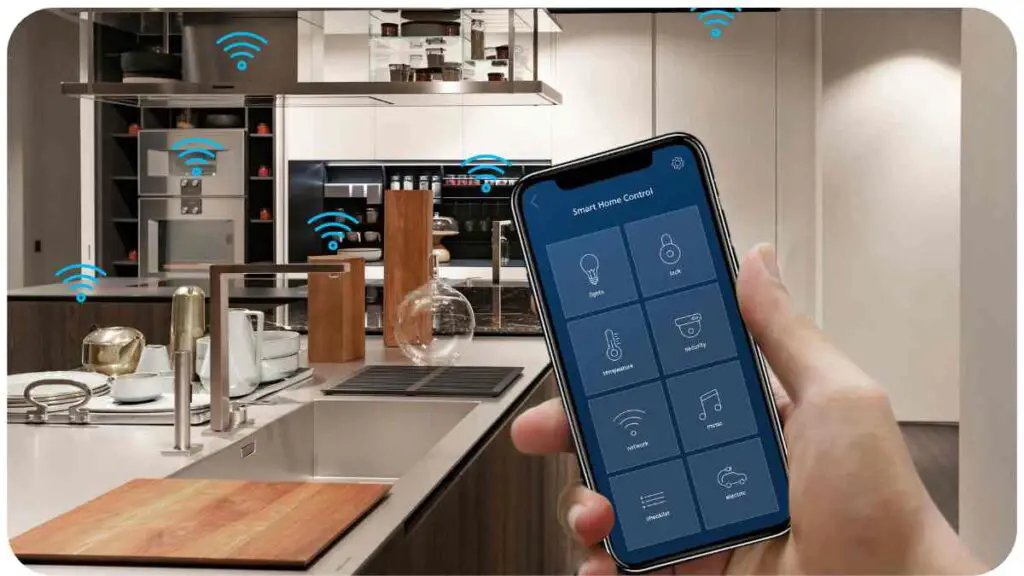
These intelligent surfaces offer various features such as touch-sensitive controls, integrated LED lighting, Wi-Fi connectivity, and even interactive screens. By incorporating smart features into your kitchen backsplash, you can control lighting, access recipes, watch cooking tutorials, and manage other smart devices without leaving the cooking area.
| Feature | Description |
| Touch-sensitive controls | Easily adjust lighting, temperature, and other settings with a simple touch. |
| Integrated LED lighting | Illuminate your workspace with customizable and energy-efficient lighting. |
| Wi-Fi connectivity | Connect your backsplash to your home network for seamless integration. |
| Interactive screens | Access recipes, watch cooking videos, or browse the internet right on your backsplash. |
4. Advantages of Installing a Smart Kitchen Backsplash
When considering a smart kitchen backsplash, it’s important to recognize the advantages it brings to your cooking and living experience:
- Increased functionality: With touch-sensitive controls and integrated features, a smart backsplash offers convenience and efficiency in the kitchen.
- Enhanced ambiance: Integrated LED lighting allows you to create the perfect ambiance for various activities, from bright task lighting for prepping to softer lighting for casual dining.
- Streamlined operations: By connecting your backsplash to your smart home devices, you can easily control multiple functions without leaving the cooking area, ultimately simplifying your daily tasks.
- Access to information: Interactive screens provide a gateway to recipes, tutorials, and entertainment content, making cooking more enjoyable and versatile.
- Modern aesthetics: Smart backsplashes effortlessly blend technology with design, elevating the overall look and feel of your kitchen.
Dealing with a stubborn clog in your drain? Learn effective techniques on how to tackle it with our comprehensive instructions on How to Remove a Stuck Drain Snake. Don’t let a clogged drain disrupt your daily routine.
5. Step-by-Step Guide to Installing a Smart Kitchen Backsplash

Now that we understand the importance and advantages of a smart kitchen backsplash, let’s dive into the installation process. Follow these steps to ensure a successful installation:
5.1 Choosing the Right Material
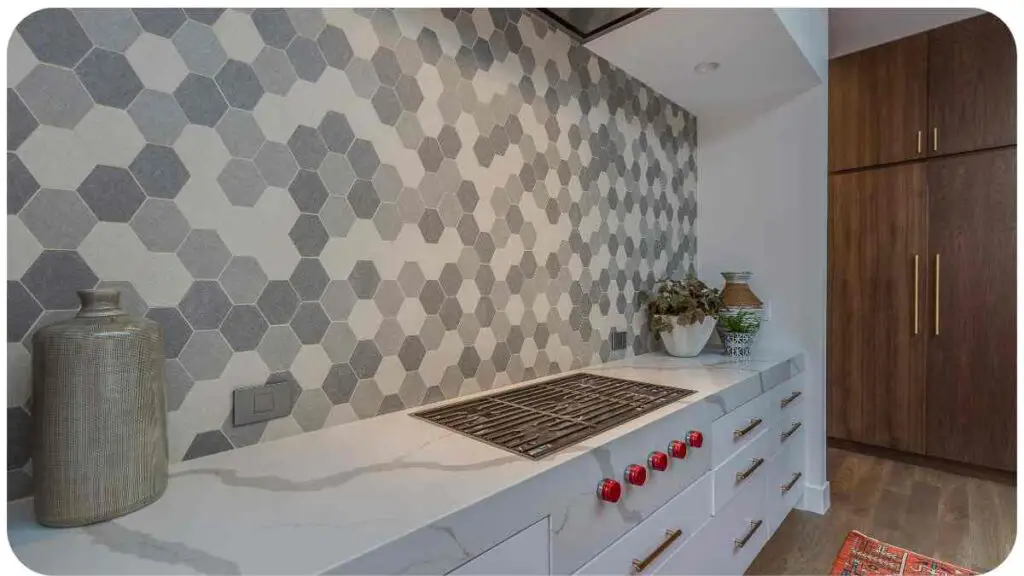
Before starting the installation, it’s crucial to select a suitable material for your smart kitchen backsplash. Consider factors such as durability, maintenance requirements, aesthetic appeal, and compatibility with smart features. Common options include ceramic tiles, glass, stainless steel, and even smart panels specifically designed for backsplashes. Choose a material that aligns with your style and meets your functional needs.
| Material | Pros | Cons |
| Ceramic Tiles | Wide range of styles and colors, easy to clean and maintain. | Grout lines require periodic cleaning, not as heat-resistant. |
| Glass | Sleek and modern look, easy to clean, reflects light. | Sensitive to scratches, may require more maintenance. |
| Stainless Steel | Durable, resistant to heat and stains, easy to clean. | Can show fingerprints and smudges, may not suit all styles. |
| Smart Panels | Designed specifically for smart backsplashes, integrated features. | Limited options, higher cost compared to other materials. |
5.2 Preparing the Wall Surface
Now that you have chosen your material, it’s time to prepare the wall surface. Clean the wall thoroughly to remove any dirt, grease, or old adhesive. For a smooth application, ensure that the surface is dry and free from any imperfections. If needed, use a primer to create a suitable base for the adhesive.
5.3 Measuring and Marking the Wall
Accurate measurements are crucial for an aesthetically pleasing backsplash. Measure the dimensions of the wall and mark the vertical centerline. This guideline will help you align the tiles or panels symmetrically. Additionally, plan out the design, taking into consideration any electrical outlets or switches that may need to be integrated into the backsplash.
Is your refrigerator acting up? Don’t worry, many common issues can be resolved with simple DIY solutions. Check out our guide on Troubleshooting Common Refrigerator Problems to keep your fridge running smoothly.
5.4 Applying Adhesive
Following the manufacturer’s instructions, apply adhesive to the back of each tile or panel using a notched trowel. Start from the centerline and work your way outwards, ensuring even coverage. Press the tiles firmly onto the wall, using spacers if necessary to maintain consistent gaps between them.
5.5 Installing the Tiles
Continue placing the tiles or panels, following your predetermined design. Use a level or straightedge to ensure they are aligned both horizontally and vertically. Make any necessary cuts or adjustments using a tile cutter or appropriate tool. Take your time and pay attention to detail to achieve a professional finish.
5.6 Grouting and Finishing Touches
Once the adhesive has dried and the tiles are securely in place, it’s time to apply grout. Choose a grout color that complements your design and mix it according to the manufacturer’s instructions. Using a rubber float, spread the grout over the tiles, ensuring it fills the gaps completely.
Remove any excess grout and smooth the surface. Allow the grout to dry as instructed before proceeding.
5.7 Connecting Smart Features
If your smart kitchen backsplash incorporates features such as touch-sensitive controls or LED lighting, now is the time to connect them. Follow the manufacturer’s instructions to wire and configure the smart features, ensuring they are safely integrated into your kitchen’s electrical system. Seek professional assistance if necessary to ensure proper installation and functionality.
Efficient laundry practices require proper drainage setup. Explore our tips and guidelines on achieving an Efficient Laundry Setup: Washing Machine and Sink Drainage to ensure your laundry area functions flawlessly.
6. Do’s for a Successful Smart Kitchen Backsplash Installation
To ensure a successful installation of your smart kitchen backsplash, follow these essential do’s:
6.1 Do Consider the Environment
Before choosing a material for your backsplash, consider the environment in your kitchen. Take into account factors such as heat, moisture, and cooking splatters. Select a material that can withstand these conditions and is suitable for your cooking habits.
6.2 Do Choose a Durable and Easy-to-Maintain Material
Opt for a material that is durable and easy to maintain. A smart kitchen backsplash should endure daily wear and tear, so consider materials like stainless steel or ceramic tiles that are known for their resilience and easy upkeep.
6.3 Do Plan the Design and Layout in Advance
Take the time to plan out the design and layout of your backsplash before installation. Consider the size and shape of your kitchen, the color scheme, and the overall aesthetic you want to achieve. Planning ahead will ensure a cohesive and visually pleasing result.
6.4 Do Follow the Manufacturer’s Instructions
Whether it’s for adhesive application, grouting, or connecting smart features, always follow the manufacturer’s instructions carefully. Each material and product may have specific requirements, and adhering to the instructions will ensure a successful installation.
6.5 Do Seek Professional Help if Needed
If you are unsure about any aspect of the installation process or if you’re dealing with complex smart features, don’t hesitate to seek professional help. Hiring a professional can save you time, minimize errors, and ensure a high-quality installation.
7. Don’ts to Avoid Common Mistakes
Looking to upgrade your shower experience? Replace your shower head like a pro with our expert tips and tricks. Discover more about How to Replace a Smart Shower Head to enhance your daily bathing routine.
To avoid common mistakes during the installation process, here are some important don’ts:
7.1 Don’t Rush the Preparation Process
Properly preparing the wall surface is crucial for a successful installation. Don’t rush through this step. Take the time to clean, dry, and prime the wall as recommended to ensure a strong bond between the adhesive and the wall surface.
7.2 Don’t Neglect Cleaning and Priming the Wall
Before applying the adhesive, make sure the wall is clean and free of any debris or residues that could interfere with adhesion. Additionally, if recommended by the manufacturer, apply a suitable primer to create an optimal surface for the adhesive.
7.3 Don’t Forget to Use Spacers
Using spacers between tiles or panels is essential to maintain even gaps and ensure a professional-looking result. Don’t skip this step, as it could lead to uneven tiles or panels and compromises the overall aesthetic.
7.4 Don’t Overapply Adhesive or Grout
Applying too much adhesive or grout can result in messy and difficult cleanup. Follow the manufacturer’s recommendations for the right amount, and apply it evenly to achieve a clean and seamless finish.
7.5 Don’t Skimp on Sealing the Tiles
If your selected material requires sealing, don’t skip this step. Sealing helps protect the tiles from stains, moisture, and everyday wear, ensuring their longevity and maintaining their appearance.
8. Common Challenges and How to Overcome Them
During the installation of a smart kitchen backsplash, you may encounter certain challenges. Here are some common ones and tips to overcome them:
| Challenge | Solution |
| Uneven walls | If your walls are uneven, use a thin layer of joint compound or leveling agent to smooth them. |
| Cutting intricate shapes or around outlets | Use a wet saw or a tile cutter with a diamond blade to make precise cuts or hire a professional for complex cuts. |
| Adhesive drying too quickly | Work in small sections, applying adhesive and placing tiles one area at a time to prevent the adhesive from drying out prematurely. |
| Grout haze on tiles | Use a grout haze remover or a mixture of vinegar and water to clean the tiles and remove any residue. |
| Integration of smart features | Follow the manufacturer’s instructions carefully and seek professional help if needed to integrate and troubleshoot any smart features. |
9. Maintaining and Caring for Your Smart Kitchen Backsplash
Once your smart kitchen backsplash is installed, proper maintenance is essential to keep it looking its best and functioning optimally. Here are some maintenance tips:
- Regularly clean your backsplash using a mild, non-abrasive cleaner to remove grease, splatters, and dirt.
- Avoid using harsh chemicals or abrasive cleaners that may damage the surface or smart features.
- If your smart backsplash has touch-sensitive controls, ensure they are kept clean and free from dust or buildup.
- If your backsplash includes LED lighting, periodically check and replace any burnt-out bulbs to maintain consistent illumination.
- Consult the manufacturer’s guidelines for specific maintenance recommendations based on the material and smart features of your backsplash.
10. Recommended Smart Kitchen Backsplash Brands
When it comes to smart kitchen backsplashes, several reputable brands offer high-quality products. Here are a few recommended brands known for their innovation and craftsmanship:
| Brand | Description |
| SmartTile | Offers a wide selection of peel and stick smart backsplash solutions. |
| FIBARO | Specializes in smart backsplashes with integrated home automation features. |
| AmbiSense | Provides smart panels with customizable LED lighting and interactive screens. |
| GE Appliances | Offers smart backsplashes with Wi-Fi connectivity and touch-sensitive controls. |
11. Conclusion
Congratulations! You have reached the end of this guide on installing a smart kitchen backsplash. By following the step-by-step instructions, considering the do’s and don’ts, and overcoming potential challenges, you are well-equipped to embark on this exciting project. A smart kitchen backsplash not only protects your walls but also adds a touch of modern technology and functionality to your cooking space.
Remember to choose the right material, properly prepare the wall surface, plan the design, and follow the manufacturer’s instructions. Consider seeking professional help if needed to ensure a successful installation. Once installed, maintain and care for your smart kitchen backsplash to maximize its longevity and performance.
With the integration of smart features, such as touch-sensitive controls, LED lighting, and interactive screens, your smart kitchen backsplash will elevate your cooking experience to a whole new level. Enjoy the convenience, style, and functionality that a smart kitchen backsplash brings to your home!
Happy installing and enjoy your newfound smart kitchen!
Note: Always refer to the manufacturer’s instructions and guidelines specific to the product you are installing for the most accurate and up-to-date information.
Further Reading
Here are some additional resources that you may find helpful for further information on installing a smart kitchen backsplash:
- Dos and Don’ts from a First-Time DIY Subway Tile Backsplash Install: This article provides helpful tips and precautions to consider when installing a subway tile backsplash, ensuring a successful DIY installation.
- How to Install a Tile Backsplash: Lowe’s provides a comprehensive guide on installing a tile backsplash, including step-by-step instructions and useful tips.
- Read This Before Installing a DIY Kitchen Backsplash: This blog post discusses important factors to consider before attempting a DIY kitchen backsplash installation, such as material selection, preparation, and design considerations.
FAQs
What are the benefits of installing a smart kitchen backsplash?
A smart kitchen backsplash provides various benefits, such as added functionality with touch-sensitive controls, integrated LED lighting for ambiance, and the ability to connect with other smart home devices.
Can I install a smart kitchen backsplash myself?
Yes, many smart kitchen backsplashes are designed for DIY installation. However, it’s important to consider your skill level, the complexity of the installation, and any electrical work required. Seeking professional help may be advisable for more intricate installations.
What materials are commonly used for smart kitchen backsplashes?
Popular materials for smart kitchen backsplashes include ceramic tiles, glass, stainless steel, and smart panels specifically designed for backsplash installations. Each material has its own aesthetics, durability, and maintenance requirements.
How do I maintain and clean a smart kitchen backsplash?
Routine cleaning with a mild, non-abrasive cleaner is usually sufficient for maintaining a smart kitchen backsplash. Avoid using harsh chemicals or abrasives that could damage the surface or smart features. Refer to the manufacturer’s cleaning recommendations for specific instructions.
Can I integrate smart features into my existing backsplash?
In some cases, yes. There are smart products available that can be retrofitted onto existing backsplashes, such as smart outlets or smart switches. However, it’s important to ensure compatibility and seek professional assistance if needed for electrical connections.

Hellen James is the author of the blog and a licensed plumber with over 15 years of experience. She shares her knowledge and experience in plumbing and drainage through insightful and informative articles

